You can add file attachments to a customer profile. Attachments are managed via the Attachments tab in the customer profile.
This article covers:

- Only PDF files less than 2mb can be added as attachments
- The following Error is displayed if you attempt to attach any other type of file:

- Attachments can be sorted by clicking the corresponding Column Header e.g. File Size, Date Added etc
Some things to note:
- The Attachments tab is not available when first adding a customer, it is only available once the customer profile has been saved
- Attachments are backed up as part of the Minfos existing backup process
- If a customer with attachments is deleted, the attachments are also deleted
- If two customers are merged the Slave customer’s attachments will be attached to the Master customer profile, if the attachments are no longer required you will need to delete them
- By default, attachments are retained for 36 months before being automatically deleted. This time period can be adjusted, please refer to Configure Customer Attachments Retention Period for guidance
Add an attachment
From the Customer Editing window:
1. Click the Attachments tab.

2. Click Select File.

The Open window is displayed.
3. Navigate to the file location of the required PDF attachment and click Open.

The Customer Editing window is re-displayed.
4. If required, use the Enter a description (if required) field to enter a description of the attachment.

5. Click Add Attachment.

The file is attached.
Note: If you attempt to attach a file with the same name as an existing file, the Replace Attachment prompt is displayed: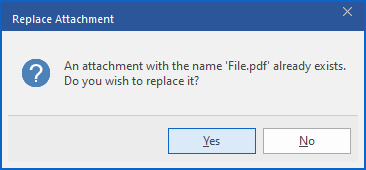
Click Yes, to replace the existing file or, click No, you will need to rename the file before attaching.
Tip: To satisfy PII requirements, you may need to delete the local copy of the file.View Customer Attachments
From the Attachments tab of the Customer Editing window:
1. Highlight the required attachment and click View, or double click the attachment.

The PDF is displayed.
Note: A temporary local copy of the attachment is downloaded to the workstation, this is automatically deleted daily.
Delete Customer Attachments
From the Attachments tab of the Customer Editing window:
1. Highlight the required attachment and click Delete.

The Delete Attachment prompt is displayed.

2. Click Yes to delete the attachment.
The Customer Editing window is re-displayed, and the attachment has been deleted.
