
Updated functionality currently in Beta
This article contains either new or updated functionality that is not generally available at this time.
The AI Invoice Scanner streamlines order creation by automatically reading supplier invoices from a PDF or saved image. Simply upload your invoice, review the extracted information, and create your order in just a few clicks - saving time and reducing manual data entry.
- Ensure the invoice to be entered is saved and accessible from the workstation. For best results, ensure the pdf or image is clear and easy to read. Invoices that have been annotated or highlighted may generate an error.
Note Uploaded invoices must be less than 4MB.
- From the Stock Manager module, click Order Maintenance.
The Order Maintenance window is displayed. 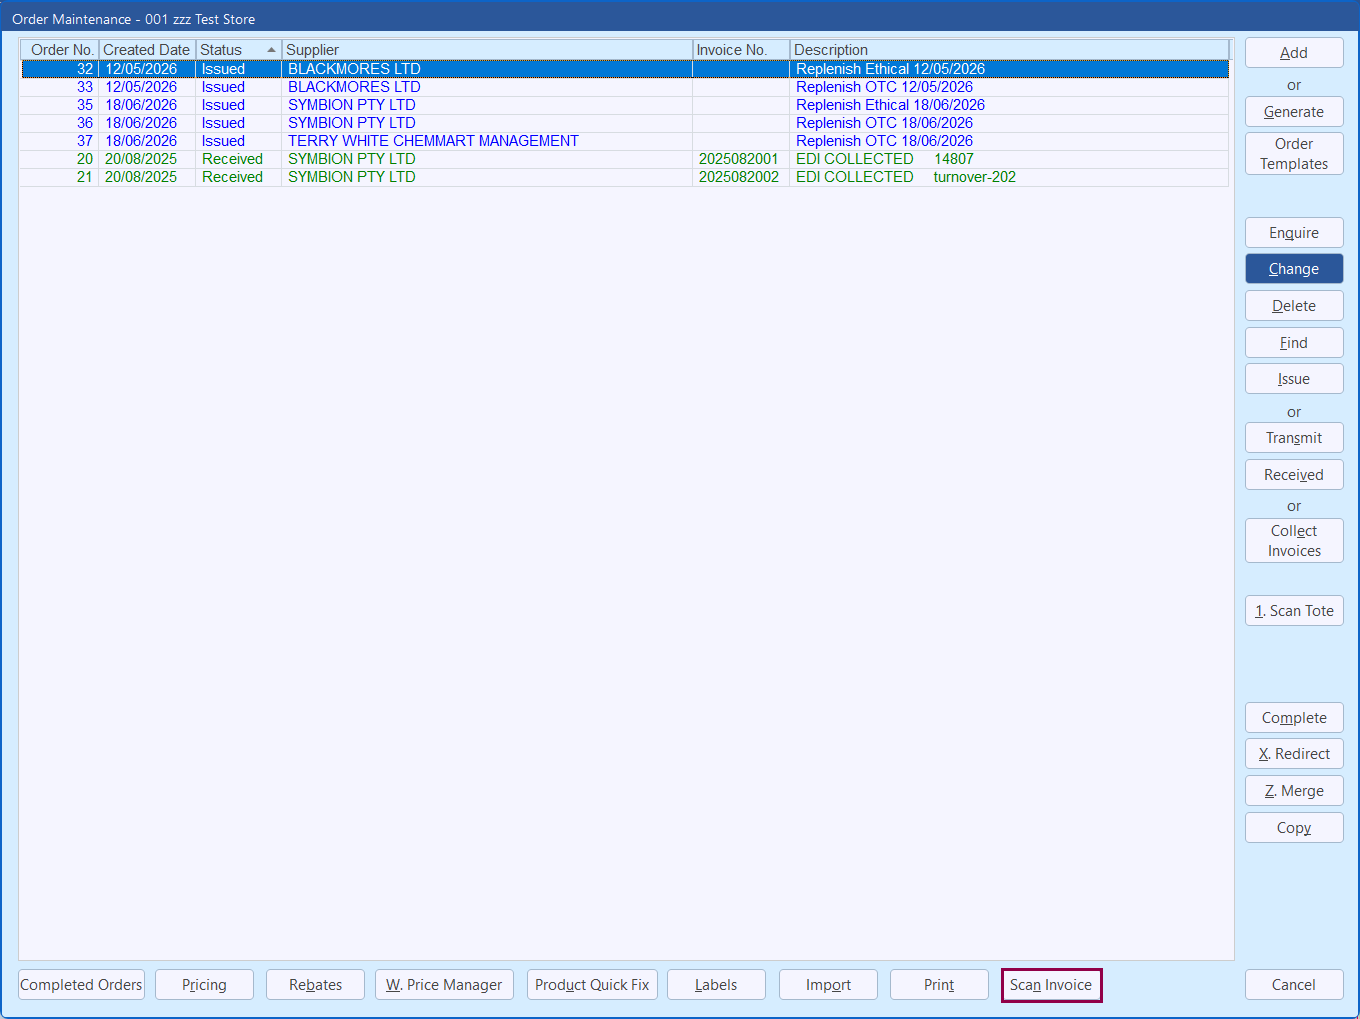
- Click Scan Invoice.
The AI Invoice Scanner window is displayed. This window may take a moment to load. 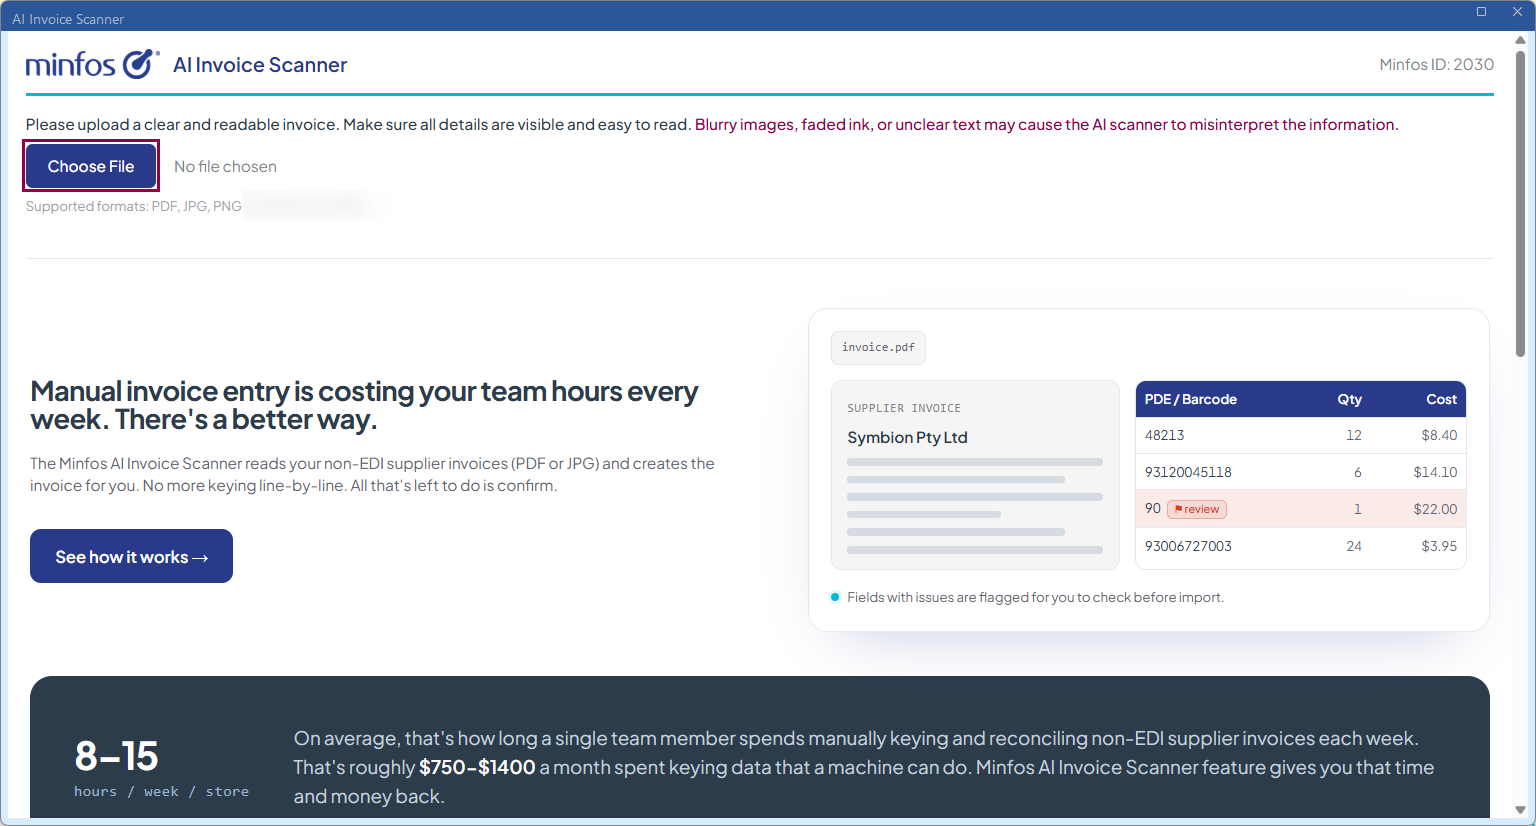
- Click Choose File.
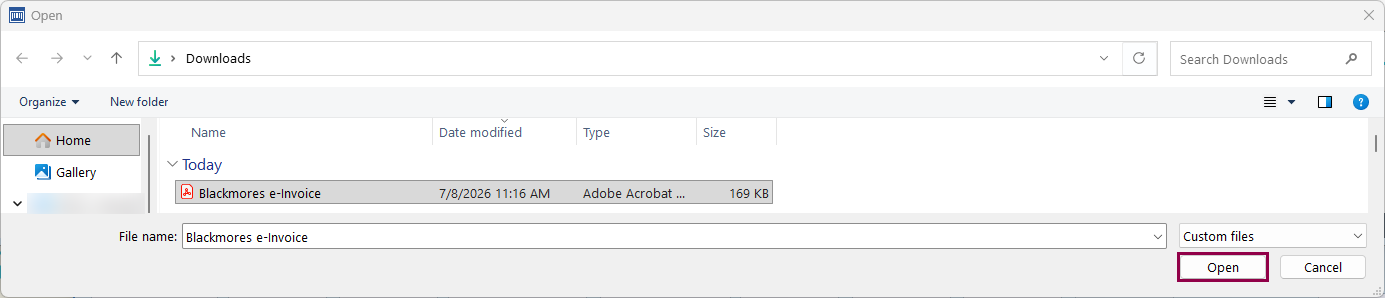
The Open window is displayed.
- Select the invoice to be entered, then click Open.
- Please wait for the invoice to be scanned.
If the Supplier is not automatically matched an alert message is displayed.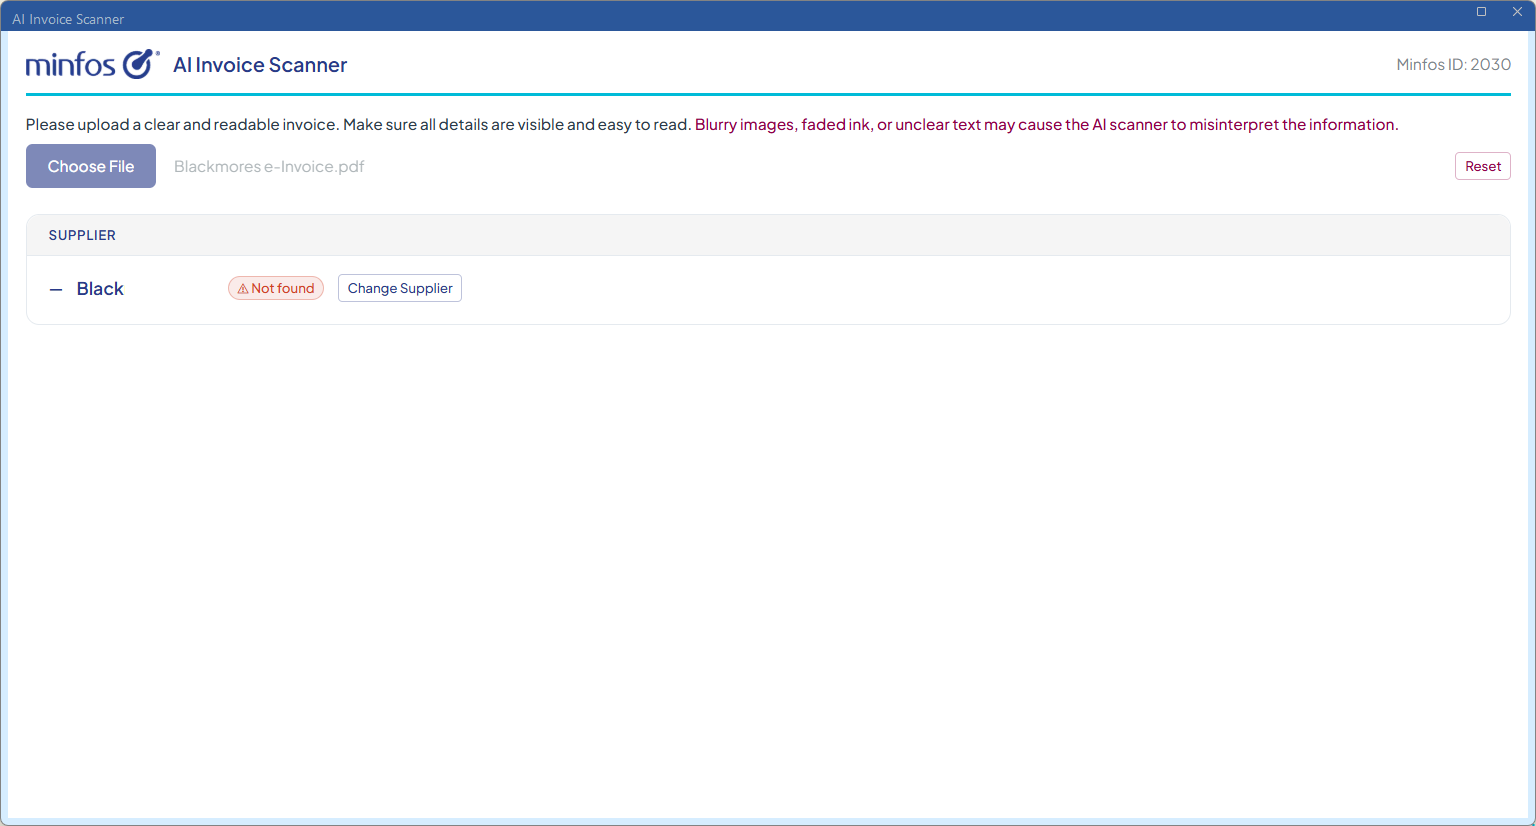
- Click Change Supplier.
- Enter a Supplier name or Ccode in the field and click Search.
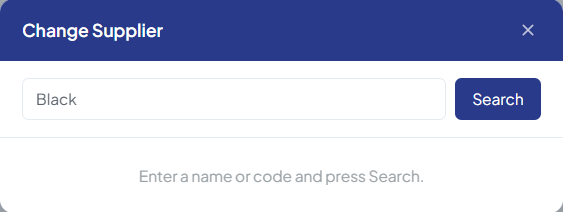
The search results are displayed.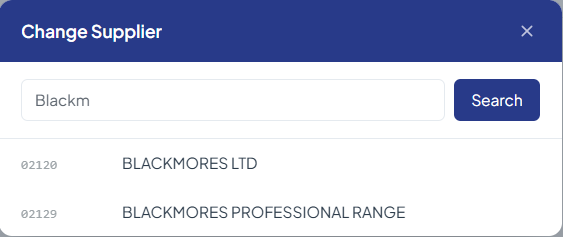
- Select the supplier.
The supplier is verified and the information from the scanned invoice is displayed. 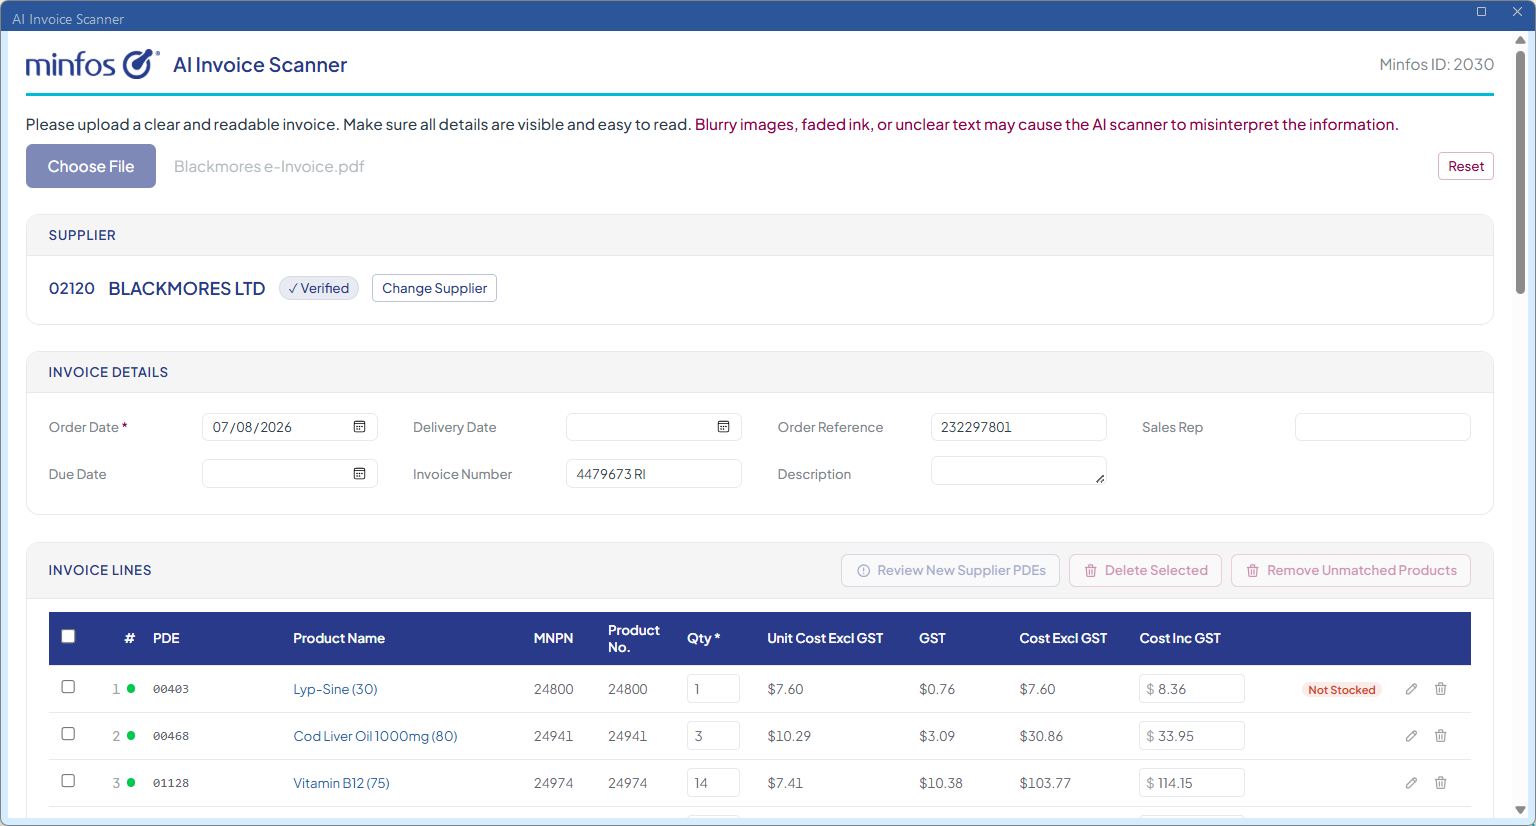
- Review each section of the the invoice information, adding or updating information as required. Refer to the steps below for detailed information about each section.
- Review the Supplier section.

- Confirm the Supplier code and name are correct.
- If required, click Change Supplier to search for and save a different supplier for the invoice. All products are revalidated
- Confirm the Supplier code and name are correct.
- Review the Invoice Details. Add or update any missing or incorrect details.

- Review the Invoice Lines section.
- Edit the Qty if required.
- Edit the Cost Inc GST if required.
- To match the line item to a different Minfos product, click the pencil icon.

- Enter the Product Name, PDE or Barcode for the product you want to match to, then click Search.
- Select the item from the search results displayed.
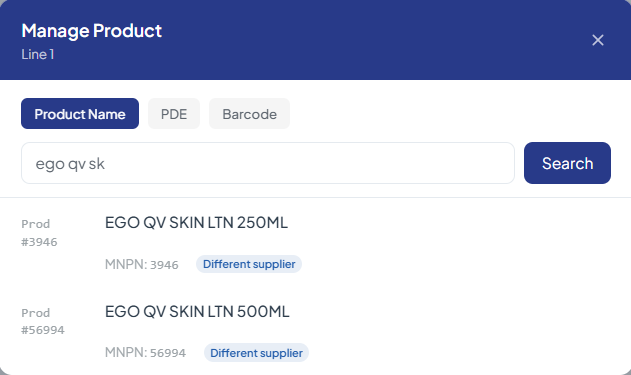
- If you select an item that does not have a PDE for the current supplier, a new PDE will need to be created. The Review PDE icon is displayed.

- Click Review New Supplier PDEs.
- Review the information displayed in the review New Supplier PDEs window. The New PDE defaults to the PDE from the invoice. If this is not available, the barcode will be used. If required, enter a different value in the New PDE field.
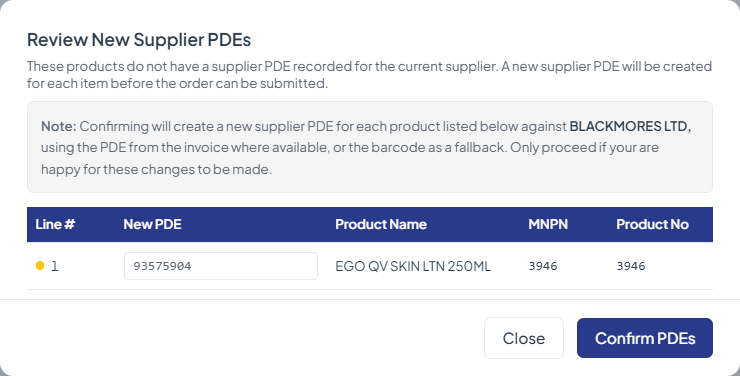
- Click Confirm PDEs to create the new PDE for the item for this supplier. Or, click Close to exit the window without making changes.
- To delete a line item, click the bin icon for that line.
Alternatively, to bulk line items, select the checkbox of any relevant items and click Delete Selected.
- To remove any unmatched products from the invoice click Remove Unmatched Products.
Note All unmatched products must be either matched to a Minfos product or removed before the invoice can be created in Minfos.
- To add a product to the invoice select Add Line.

- Enter the Product Name, PDE or Barcode of the product to be added and click Search.
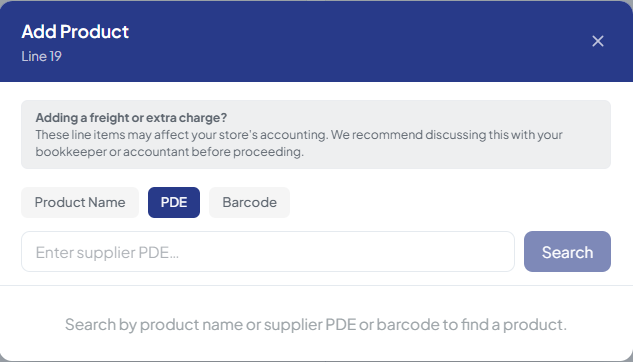
- Select the relevant item from the search results.
Note    If you select an item that does not have a PDE for the current supplier, a new PDE will need to be created. The Review PDE icon is displayed.
a. Click Review New Supplier PDEs.
b. Review the information displayed in the Review New Supplier PDEs window. The New PDE defaults to the PDE from the invoice. If this is not available, the barcode will be used. If required, enter a different value in the New PDE field.
c. Click Confirm PDEs to create the new PDE for the item for this supplier. Or, click Close to exit the window without making changes.- The item is added to the invoice.
- Update the Qty if required.
- Enter the Total Inc GST for the line.
- Select the Order Status for this invoice:
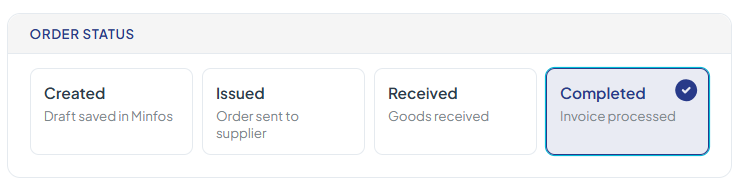
- Select Created to save a draft in Minfos.
- Select Issued to mark the order as being sent to the supplier.
- Select Received if the goods have been received.
- Select Completed to save the invoice as processed in Minfos.
- Review the Order Totals section and make changes where required.
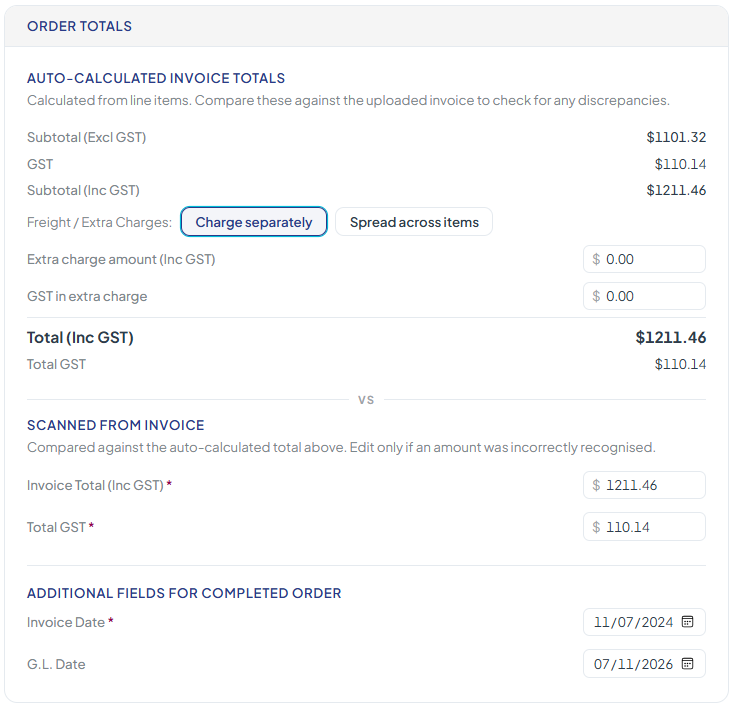
- If applicable, choose how Freight/Extra Chargesshould be handed:
- Select Charge Separately to add the amount to the Extra Charges field on Completed orders.
- Select Spread across items to distribute the amount evenly across all products.
- Add a freight line item - inserted as its own order line.
- Enter any Extra charge amount (inc GST).
- Enter any GST in the Extra charge
- Review the calculated Total (Inc GST) vs the Invoice Total scanned from the invoice.
- Review the calculated Total GST vs the Total GST scanned from the invoice.
- If applicable, choose how Freight/Extra Chargesshould be handed:
Any different between the calculated and scanned totals is shown in red. An alert is also displayed.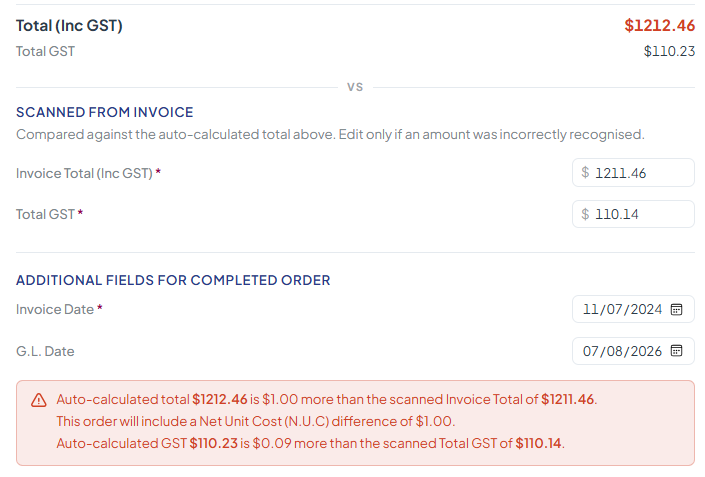
- Verify the Invoice Date and update if required.
- Verify the GL Date and update if required.
- Click Submit to create the invoice in Minfos.
A prompt is displayed.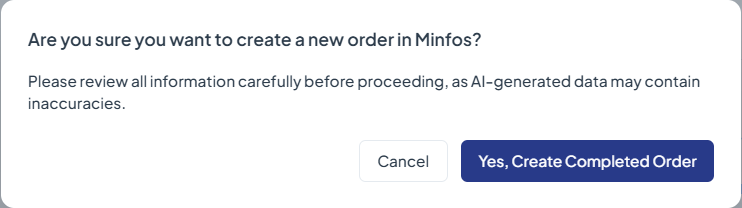
- Click Yes, Create Order to confirm.
The invoice is created in Minfos and a confirmation prompt is displayed.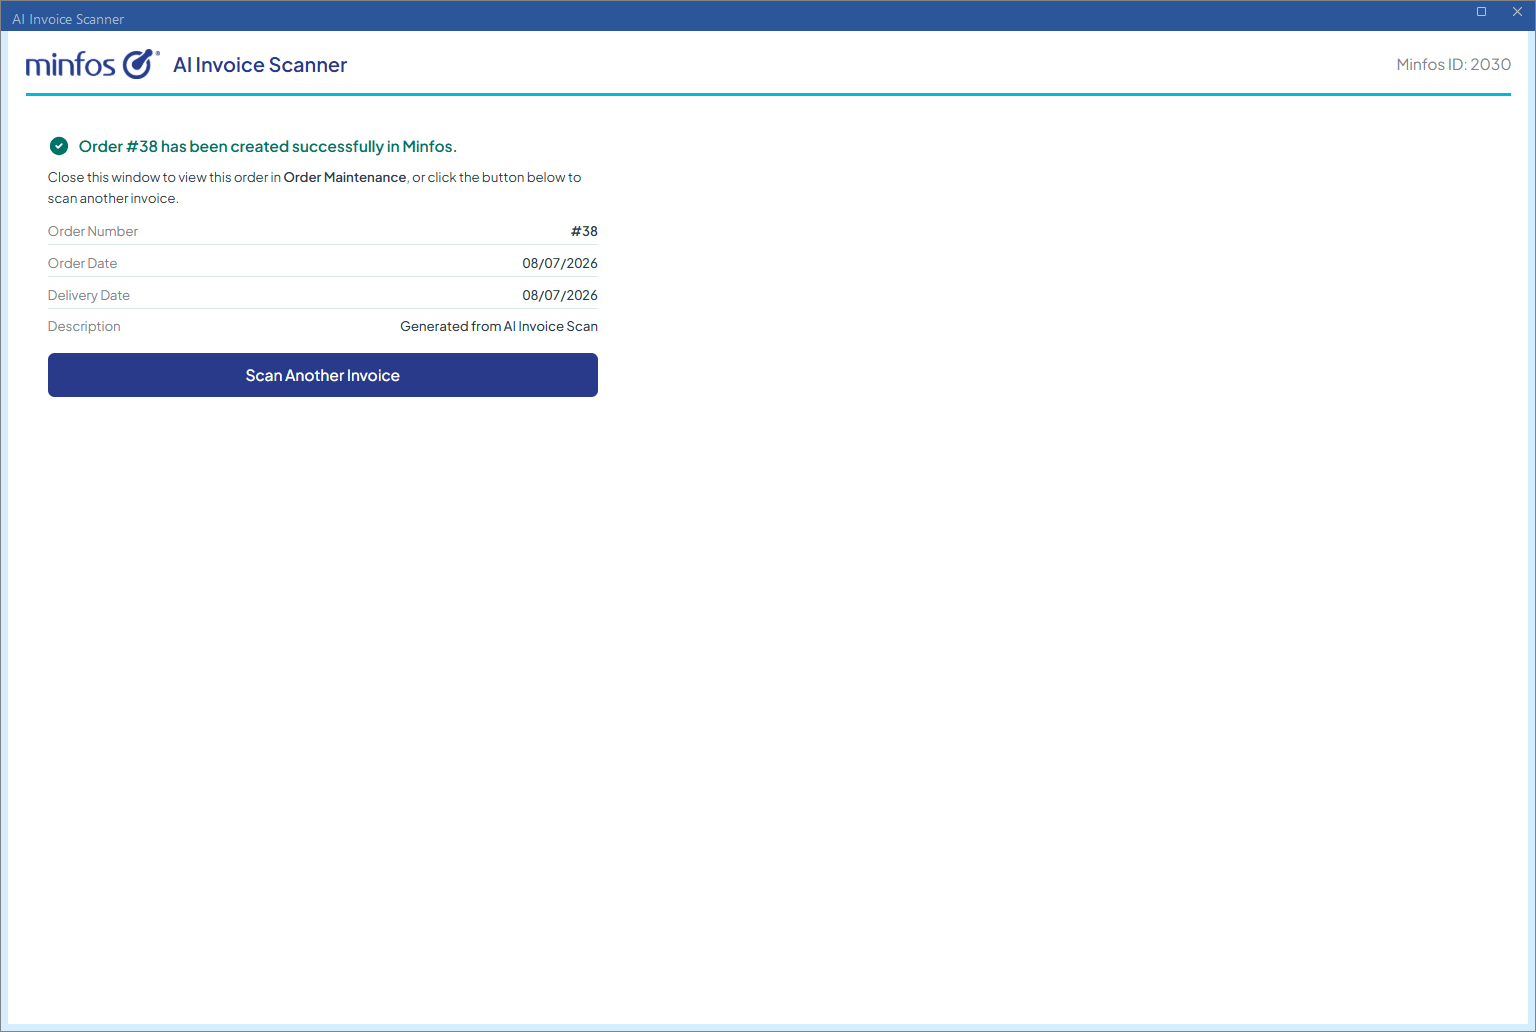
- Click Scan Another Invoice to continue.
- Repeat this process for the next invoice or close the window to return to Order Maintenance.