Video demonstration
Step by step instructions
From Stock Manager:
1. Click the Stock Control menu and select 2. Rolling Stocktake.
The Rolling Stocktake Entry window is displayed. 2. Select Location from the Sort by dropdown.
3. Leave the From and To fields as the default. This will generate the rolling stocktake window in the same order as the stocktake sheets.
4. Select the Stocked Only checkbox.
5. Leave the Negatives Only checkbox unselected.
6. Select the Not Counted checkbox.
7. In the Since the cutoff date field, enter the same date that was entered for the not counted stocktake sheets.
8. Click Okay.
The Rolling Stocktake window is displayed. 9. Double click on the first product to open the Product Stock on Hand Edit window.
10. Adjust the Qty Counted figure as required.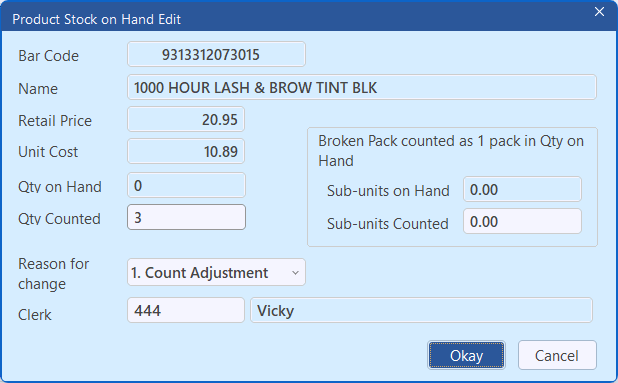
11. The Reason for Change can be adjusted, but as this a stocktake it should be left on 1. Count Adjustment.
12. Enter your Clerk code. You will only be required to enter your Clerk code for the first change. Minfos will retain the entered Clerk code until you exit the window.
13. Click Okay [Enter] to close the Product Stock on Hand Edit window for this product and open the Product Stock on Hand Edit window for the next product in the list.
You will notice a √ appear next to the left of each product as you change the counted quantity.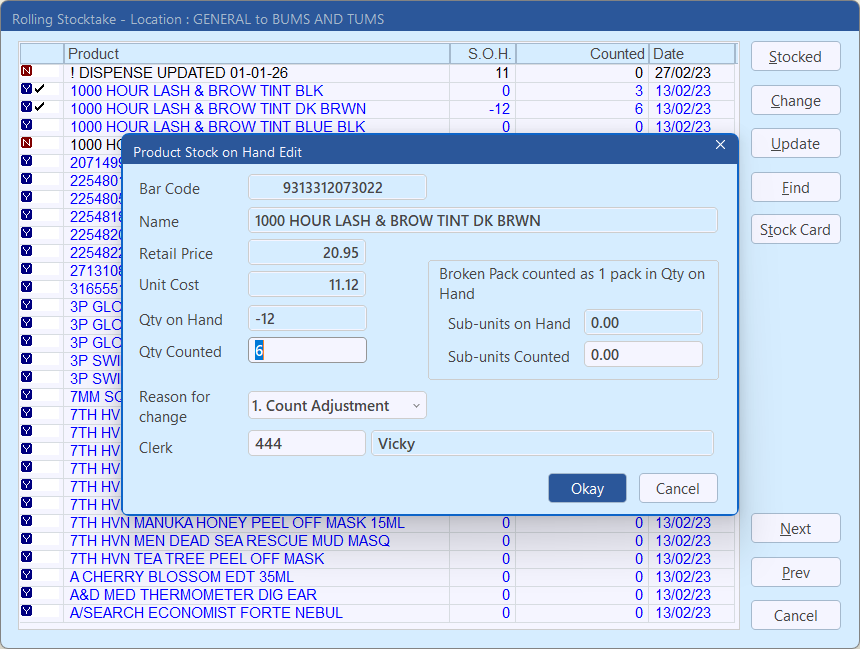
The Product Stock on Hand Edit window will close, when the last product on the Rolling Stocktake window has had a Qty Counted entered.
Products which the pharmacy no longer stock from this list, should now have a zero in the counted column, a √ to the left of the product column and should now be marked as not stocked.
14. Hold down the [Ctrl] key and click on each item of these items to highlight, then click Stocked to mark them as not stocked.
15. The stock on hand now needs to be updated for all products on this screen, click Update to do this. 16. As the products have now been updated, the Rolling Stocktake window will automatically update to the next screen. Repeat steps 10 to 15, until all products have been updated.
Next steps: